Easy Ways To Change Your Piano’s Tone

Easy Ways To Change Your Piano’s Tone

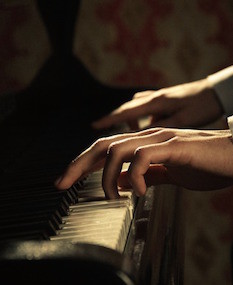
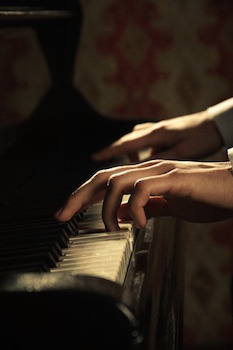
Have you ever listened to a piano in a grand concert hall, impressed with its overall sound? Then you return to your home, play the same song, and wonder what happened to the quality of the music?

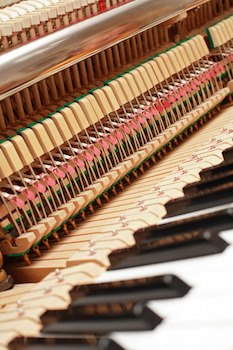
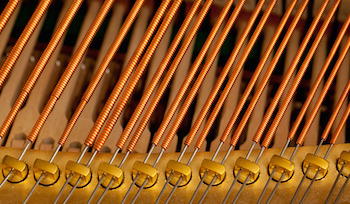
Your piano’s tone depends on a variety of things. A piano will have a bright tone if it has many upper partials; a subdued tone if it lacks. If it is placed on a hard surface, it will reflect the sound; a soft surface will absorb it.Easy Ways To Change Your Piano’s Tone

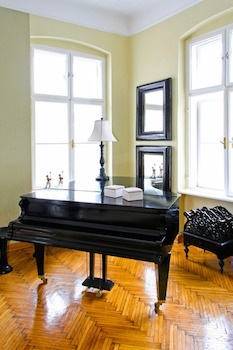
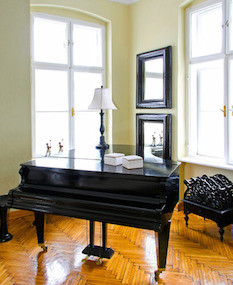
Just by changing the position and location of your piano, you can adjust the sound your piano produces. Hardwood floors, tile floors, carpeting, high ceilings, hard walls, glass windows, upholstered furniture, drapery, even people will all change the acoustical conditions of the room, and thus impact the sound being produced.

If you prefer a bright sound, a room with hard surfaces will help you create an incisive sound. If you prefer a more subdued tone, add softer elements to help absorb the sound.

For a bright tone:

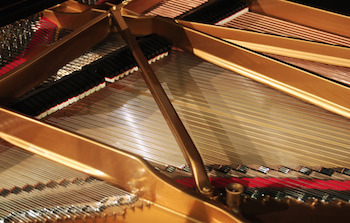
  • Open the lid of your grand piano. The strings will reflect the sound outward, and amplify it into the room. The lid should open into the room, not into a wall.
  • Draperies should be kept at a minimum. If you choose to cover your windows, choose freeflowing, unlined drapery that will help produce a richer sound. One caveat: if your room has lots of windows, make sure sunlight doesn’t stream onto the piano, which can cause it to go out of tune in a much faster timeframe.
  • Use light fabrics for your decorating. Avoid velvets and brocades and choose cottons and satins instead.
  • Replace carpeting with wood or tile.
  • Remove acoustical or textured ceilings.

For a subdued tone:

  • Close the lid on the grand piano, or use the half stick.
  • Use acrylic caster cups on the piano legs to isolate the piano from the flooring, to prevent the floor from acting as a soundboard.
  • Use soft wall treatments, such as cork, and make sure all doors and windows are properly sealed.
  • Use heavier drapery.
  • Select heavier upholstered furniture.
  • Install wall to wall carpeting.

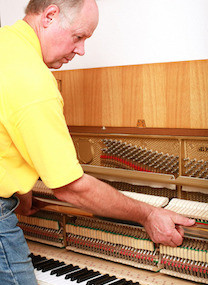
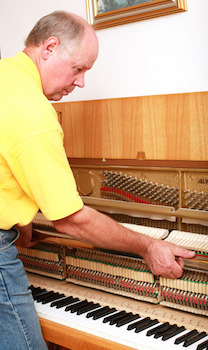
When you work to change the tone being produced by your piano, don’t forget to have a technician voice your piano when your redesign is completed. A revoicing will help further create the tone you are looking for.

My Piano’s Soundboard Is Cracked … Now What?

My Piano’s Soundboard Is Cracked … Now What?

A piano’s soundboard is one of the most important pieces on a piano.

If you open up the lid of either your upright or grand piano and look down, you will see a shiny piece of wood that runs the down the back or the bottom of the instrument. This is the soundboard.My Piano’s Soundboard Is Cracked … Now What?

The soundboard is what allows the piano to project its sound. It’s the part of the piano that turns the vibration of the strings into sound. When the strings are struck by the hammers, the soundboard takes the vibrations from the strings and amplifies them in order to project the sound outward.

Soundboards are constructed with four or five pieces of thick wood glued together and attached to the back or bottom of the piano. The pin block and iron plate are then mounted on top of the soundboard, and the piano is strung. In order to achieve perfect balance, and thus perfect sound, is to ensure the quality of the soundboard  is void of any imperfections that may have a negative effect on the quality of the sound.

So what happens when the soundboard cracks?

Nearly all soundboards will crack at some point over the life of the piano. Small cracks, especially cracks that form along the seams where the wood pieces are joined together, occur in most cases due to age. A piano will go through many changes as weather and seasonal changes bring in cold and warmth, dryness and humidity. It will be impacted by consistent playing, and the vibration that occurs from creating music.

However, a crack becomes a problem when the crack deepens, and you begin to notice a rattle or buzz whenever the piano is played. If caught early, it can sometimes be repaired using wood wedges and screws to prevent the extraneous noise. A piano restoration expert can usually make the repair quickly with effective results.

Yet when the crack deepens and the soundboard has more extensive damage, the only way the sound can be preserved is to remove the soundboard from the piano and replace it with one that closely mimics the original construction.

Have additional questions about the quality of your piano? Ready to have it restored to improve the quality of the music it creates? One of our professional restoration experts can help you choose the right path for you.

The Complete Guide To Moving A Piano

The Complete Guide To Moving A Piano

Pianos aren’t your typical furniture. You can’t shuffle a piano from one place to another by yourself. And in fact, even trying to move it with the help of a friend can be difficult at best.

Overall, pianos weigh anywhere from 300 to over 1,000 pounds, depending on the style and type. Which means in order to make sure the piano arrives safely to its final destination, and you arrive uninjured from lifting a heavy, bulky item, special precautions are needed.The Complete Guide To Moving A Piano

In almost all circumstances, a piano mover will use a special skid called a piano board to help move the piano. The piano will be wrapped in blankets and attached to the piano board.

If the piano is being moved a short distance, the piano board will be put onto a dolly and rolled to its final destination. If a stairway needs to be used, the dolly is removed and the piano is slid very slowly in a controlled manner up or down the stairs.

While an upright piano will remain standing, a grand piano is moved on its side. First the lid and the pedal lyre are removed. Then the leg at the straight side of the piano is removed and the piano is carefully lowered onto the piano board. After the two remaining legs are removed, the piano is covered with blankets and strapped to the board. In this position, it gives the movers the ability to control the piano through door openings and stairwells, without the risk of damaging the protruding legs.

Most movers will consent to moving a piano up or down one flight of stairs, when no other alternative is possible. When other options are available, movers will consider them first. To get a piano to the second floor, many movers prefer to hoist or rig it and bring it in with a crane rather than moving it up or down the stairs.

Corners are the most difficult to judge because they can’t be easily measured. When you choose a professional piano mover with lots of experience, they are better at judging what’s possible and what’s not. If a piano cannot be moved safely to its intended location, a mover will stop the move, bring the piano back to its original location until an alternative process can be devised.

Piano moving is the responsibility of the customer. If you have a move coming up, don’t wait until the last moment. By hiring a piano mover first, they can visit your location ahead of time, judge the move, and offer recommendations on how to safely get your piano from one destination to the other, safely and security.

What Is A Pitch Raise?

What Is A Pitch Raise?

How long has it been since you hired a technician to tune your piano?

Something happens to a piano when it is left untouched, untuned for a long period of time. With every year that passes, the pitch of your piano drops further and further from where it should be.What Is A Pitch Raise?

Overall, as a piano sits and absorbs the elements from the surrounding area, it will in general go flat in the colder winter months, than rise up in the summer, though in most cases the movement isn’t proportional. If this process continues time after time, it will be the job of the technician to bring it back into tune. And if and when you decide to tune it, it becomes more difficult for a piano tuner to pull it back up to its proper tension levels.

The piano contains over 200 strings, all that need to be adjusted during tuning. As a technician raises the tension of each string, it puts a lot of strain on the piano’s structure. It’s impossible to make a large jump and have a stable tuning in one pass. So the technician must spend the time raising each of the strings up to their average tension levels, then move forward once again to accurately bring it into tune. This is called a pitch raise.

The process continues until the piano is deemed to be in tune.

Also keep in mind that when a piano goes through this much adjustment at one setting, the likelihood of it moving back out of tune increases as well. It is recommended to have the piano tuned again within a six month period of time to help keep the tension level of the strings more stable.

Once a piano is back in tune, a regular tuning schedule (every six months to one year) will prevent the need for a pitch raise in the future. Like many things, regular maintenance will keep your piano in the best possible performance level.

What Is Piano Regulation?

What Is Piano Regulation?

As a piano owner, you probably have your piano tuned on a regular basis to keep it playing and performing at the best of its abilities. Yet despite regular tuning, you may still notice a deterioration of its performance.

Tuning adjusts the strings and the pins, the system that determines the pitch of each string. Your piano also requires a periodic servicing called regulation, which adjusts the mechanical parts causing the strings to sound when the keys are played and the pedals are used.What Is Piano Regulation?

Regulation is the adjustment of the mechanical aspects of the piano to compensate for the effects of wear, the settling of cloth and felt, as well as the dimensional changes in the wood and other materials due to changes in humidity levels. There are three system involved in the regulation process: the action, the trapwork and the damper system.

The action is the mechanical part of the piano that transfers the energy of the stroke of the keys to the hammers that strike the strings. The action is the most complex system of the piano, with over 9,000 working parts that are able to respond to a pianist’s every movement.

  • The trapwork are the levers, dowels and springs that connect the pedals to the action.
  • The damper system stops the vibration of the string as you strike and release the key, and is controlled by both keys and the pedal system.
  • While tuning your piano corrects the pitch of your piano, regulation attends to the touch and responsiveness of your action, all vital in creating the performance you are striving for.

All upright and grand pianos need periodic regulation to perform at their peak levels. Frequency of regulation is dependent on a variety of things, including how often your piano is used, exposure to climate changes, the piano’s quality, the age of the piano, and how well its maintained. A new piano may require regulation in its first year as it settles and adjusts to its new form and environment. The frequency after that is often determined by you and your piano technician

If your piano displays a lack of sensitivity, or simply doesn’t have the range it once had, it may be time for regulation. If you notice the keys are not level, the keys are sticking, or they are uneven to the touch, it may be time for regulation.

No amount of playing or practice can compensate for a piano that is not at its proper playing level. The only way to get a quality sound every time you play is to tune and regulate your piano on a regular basis.

Why Are There Black and White Keys On A Piano?

Why Are There Black and White Keys On A Piano?

Some of the questions we receive about pianos surprise us. Yes, we expect the questions about choosing between a new and a used piano. Or how often a piano really needs to be tuned. Yet it’s certain questions that are unexpected, and the more we think about them, the more we realize how complex they really are. Take this one for instance.

Why are there black and white keys on a piano?Why Are There Black and White Keys On A Piano?

At first glance, one of the easiest answers would be that by combining the two keys, it makes the keyboard more functional. If there were only white keys, you would have to start at the bottom and count up to find the keys needed to begin and play a song. By adding the black keys, it gives you a visual cue or repeating patterns to help you stay on track as you play.

But that’s a simple answer. And as it turns out, there is a more complex, historic answer as well.

When you look at the keyboard, by combining the black and white keys, they are laid out in a repeating pattern of groups of two black keys and groups of three black keys. When played, the white keys form a C major scale in a series of half steps – two keys together, one key between. When you play the scale from C to C, you’ll have a perfect set of twelve pitches – all half steps – that create the perfect pattern for most of the music we listen to today.

If you use only the white keys, it gives you all of the notes of the diatonic scale, which means that by transposing to C major, you can play any major key melody using only the white keys. And in fact, if you head back to the 13th century, you will find that most keyboards were white key only, with no “black keys” at all. Most religious music of the time only used C major scale pitches, so it was easy to compose on these keyboards.

Music changed when it began separating from the church, and music became more improvisational in the process. Different scales were run, and experimentation begun, which started creating faster pieces of music that became impossible to ignore the key signature sharps or flats. When people began valuing having a perfectly tuned chromatic notes that could easily be played at higher speeds, the keyboard changed in order to keep up with the demands of the music being created. While experimentation has continued throughout the centuries, this became the perfect – or the standard – in all keyboards, and it’s what we still use today.

Have any other questions about how the piano works? We’d love to hear from you.

Why Tuning Your Own Piano Is A Bad Idea

Why Tuning Your Own Piano Is A Bad Idea

It probably started with a note or two playing off key. Or maybe a single octave doesn’t sound right with the others.

You know the only way to bring it back into key is to have your piano tuned. But do you want to go through the hassle of bringing someone in? Finding the right person for the job, waiting for them to come into your home, and paying for it might not be on your list of to do’s. Maybe you should try it yourself.Why Tuning Your Own Piano Is A Bad Idea

Or should you?

Tuning your own piano is a bad idea for many reasons. And in some cases can do more harm then good.

Tuning experience on other instruments isn’t the same

Maybe you have experience tuning a guitar. It can’t be that much different, can it? Actually, it can. Each piano is unique, and is tuned based on the temperament of the piano. They have different gauges and string lengths, and therefore what sounds great on one piano may not work on the next. A professional uses sophisticated software, as well as aural tests that will help calculate how to tune the temperament of each piano he or she works on.

Tuning stability

A piano’s tuning pin must be set and secured by the tuner. A tuner will move the pin as much as is necessary to achieve the right pitch. Only then will they secure it to make sure it stays put. If its not done correctly, one aggressive song will cause the note to pop back out of tune. Its one of the last things a professional piano tuner will master, and takes most tuners many, many piano tunings to understand.

Strings breaking

Depending on the age of the piano, piano wire can become brittle and be easily broken. If the string is adjusted too far sharp, it may snap. String replacement is another skill that takes practice to develop. A professional tuner will have the appropriate tools and skills to fix or replace the piano wire if it should break during tuning.

Timing

If you talk with a piano tuner, they will tell you their first try at tuning took them four, six, even eight hours or more to bring a piano back into tune. And in some cases it wasn’t a perfect job. After years on the job and hundreds of tunings later, many tuners can perform the function in an hour or two. Tuning takes a good ear, and over time your hearing precision becomes more difficult to concentrate on. Especially when you don’t do it on a regular basis.

Best Apps To Use As A Piano Teacher

Best Apps To Use As A Piano Teacher

In today’s world, very few of us can live without our electronic gadgets. iPads, iPhones – it’s revolutionized the way we do pretty much everything. We store files, read newspapers and magazines, watch our favorite shows, even play games all from the touch of a button. But how much are you relying on your technology to help you become a better piano teacher?Best Apps To Use As A Piano Teacher

forScore

When was the last time you wanted a piece of music, known you had the sheet music for it around somewhere, only to spend hours looking for it? Problem solved with forScore. forScore allows you to organize and download a new piece of music in seconds. You can annotate and save changes and notes, re-order pages, even print sheet music when you desire. It even allows you to perform half page turns, so you can transition easily from the bottom half of one page to the top half of another. You can draw or edit the pages with adjustable formatting, and send your files to friends via email, Bluetooth, AirDrop, or simply print them out.


Tempo

Tempo is an accurate metronome that will help you and your students keep the beat. Although you can find a variety of other apps that will do the same, this one has always ranked well in the iTunes store and continues to be a teaching favorite. It plays every conceivable irregular meter, and can save personal patterns for quick access.


Rhythm Lab

With Rhythm Lab, you can copy, save and share any rhythm pattern as an image. No more drawing it out on paper or on a whiteboard, which makes it easier to pull up detailed drawings for all of your students. It also allows a student to tap on the screen and get instant feedback.


Flashnote Derby

Who says kids can’t learn things while playing games? This is one homework assignment kids can really get into. Flashnote Derby allows kids to learn and practice identifying music notes by name as they run each timed race. The faster they get with recognition, the faster their horse will travel. This game is fully customizable for and desired notes or ranges, meaning it gives a young musician a reason to move forward and learn even more.


Piano Notes Pro

For a more sophisticated note learning tool, choose Piano Notes pro. It has a wide range of level control, and provides an interesting game that will keep beginners as well as advanced piano players wanting to strive for more. It’s highly customizable and easy to use, which means it’s perfect for all ages of piano players.

Music Teachers Helper

Want an easy way to manage your studio? This tool can help you with all aspects of running a piano teaching business. From scheduling and billing, to helping you calendar out your lesson plans, this can quickly become one of the best tools you’ve ever used to grow your business.

Have any favorites yourself? We’d love to hear what apps you are using on a regular basis.

Rebuilding A Steinway Does It Have To Have Steinway Parts

Rebuilding A Steinway Does It Have To Have Steinway Parts

What do you do if you have an old Steinway piano filled with meaning, but it simply doesn’t play the way it used to? Rebuild it of course.

Rebuilding a piano is common practice in today’s world. Some of the best pianos in the world we’re made years ago. And through age and playing, they may need a little bit of work to continue being in peak condition. If you have a highly regarded, well made piano, why replace it when a little bit of work can have it in mint condition?rebuilding-a-steinway-does-it-have-to-have-steinway-parts

And in many cases, a top piano can have more value for resale than a new piano from today. Piano’s have history, that’s part of their desire. But rebuilding a piano can leave you filled with questions if you’ve never gone through the process before.

If you rebuild a Steinway piano, will it still be a Steinway?
This is one of the most frequent questions we receive. After all, a Steinway piano was originally created in house using parts and manufacturing processes exclusive to Steinway. If you use anything other that Steinway parts, is it still a Steinway?

The answer is yes. If you go with a reputable rebuilder, his first goal will be to repair your piano so it is in top playing condition. He won’t cut corners or use parts that will undermine the playability of the instrument. If Steinway parts are the best for the fix, they will be used. But in some cases, especially with older pianos, Steinway parts may not be available. In which case the most important thing is to use the best part for the repair.

Is there such a thing as imitation parts?
A Steinway piano has over 12,000 parts. A reputable rebuilder knows that to keep a piano in top condition, using the parts already there can be the best. If they are repairable, by all means use the existing parts.

But in some cases, a part is beyond repair. In order to be playable, it has to be replaced. But a part isn’t automatically inferior just because it doesn’t have “a name” on it. In all cases, the most important part of rebuilding is making sure everything fits and reacts perfectly together.

Do all parts need to be replaced?
Not always. Old hinges and hardware aren’t always broken or non-working. They simply have dulled with age. Polishing them up can make them look like new again. And because they were original to the piano, nothing will fit better on your piano. Besides, in order to be environmentally friendly, why throw away something that still works and can be made to look as good as new?

Have additional questions about rebuilding your Steinway? Give us a call or stop by today.

How To Free Sticking Piano Keys

How To Free Sticking Piano Keys

If you have a piano, and have played for any length of time, chances are you’ve experienced sticking piano keys. They play fine, until one day you press down a key and its sluggish, and simply won’t make a sound. There are a lot of reasons this can happen, including:

  • Jamming partsHow To Free Sticking Piano Keys
  • Broken action
  • Food or other particles between the keys
  • Warped keys rubbing together
  • Broken keys
  • Excessive moisture

One of the most common reasons a key will stick, causing a note to not make a sound when pressed, is moisture within the action. A key is guided in its up and down motion by two metal pins, a balance pin and a guide pin. Both pins are extended up into the key channels through a thin felt bushing cloth.

The guide pin can be the problem, especially if the piano resides in humid conditions. Even a small amount of moisture trapped in the bushing can cause the felt to swell, and cause it to grip the pin too tightly. The result is a sticking key, or a key that fails to return to its normal position after being depressed. This is also a frequent problem with new pianos, as the bushings are made to fit tightly, and it may take time to allow the felt to wear down and compress. The pin can be freed by working the pin through the bushing a few times in order to open up the space. Work the key up and down using moderate pressure to compress the felt bushing.

Another easy to fix problem, especially with new pianos, is an out of position keyslip. The keyslip is a thin strip of wood located in front of the keys. The distance between the keys and the keyslip is an eighth of an inch or less. If moisture or swelling impacts the keyslip, it can easily rub against the keys, causing them to stick. Sometimes you can gently work the keyslip back into position with your fingertips, pulling towards you. If the keyslip is warped, it may need replacing.

If the problem isn’t easily fixed, and you continue to have problems with sticking, its time to call in a reputable tuner to fix your keys and bring them back to playing condition.